Our Plugin Tutorial
Merii Security Optimizer Plugin
- In this tutorial, we will provide you with information about the various functionalities offered by Merii Security Optimizer.


What is the Merii Security Optimizer Plugin?
- Merii Security Optimizer is a WordPress plugin developed by WyMora to enhance the security of your WordPress website and mitigate various threats, including brute-force attacks, compromised logins, data leaks, and more. Merii Security is a customized version of Security Optimizer, with many added features.
- Navigating to the Merii Security Optimizer Dashboard
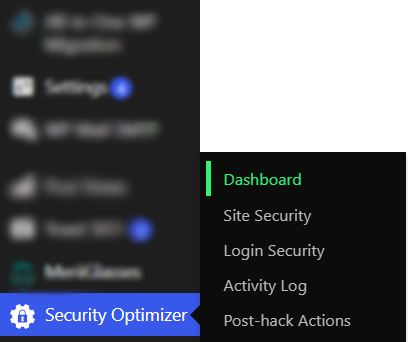
- After installing the plugin, navigate to your WordPress admin panel and click on the Merii Security Optimizer menu item to access its dashboard.
- You can locate quick navigation links to various security categories for making any necessary changes. Additionally, at the bottom of the page, you'll find a list of all recent activities on your website.
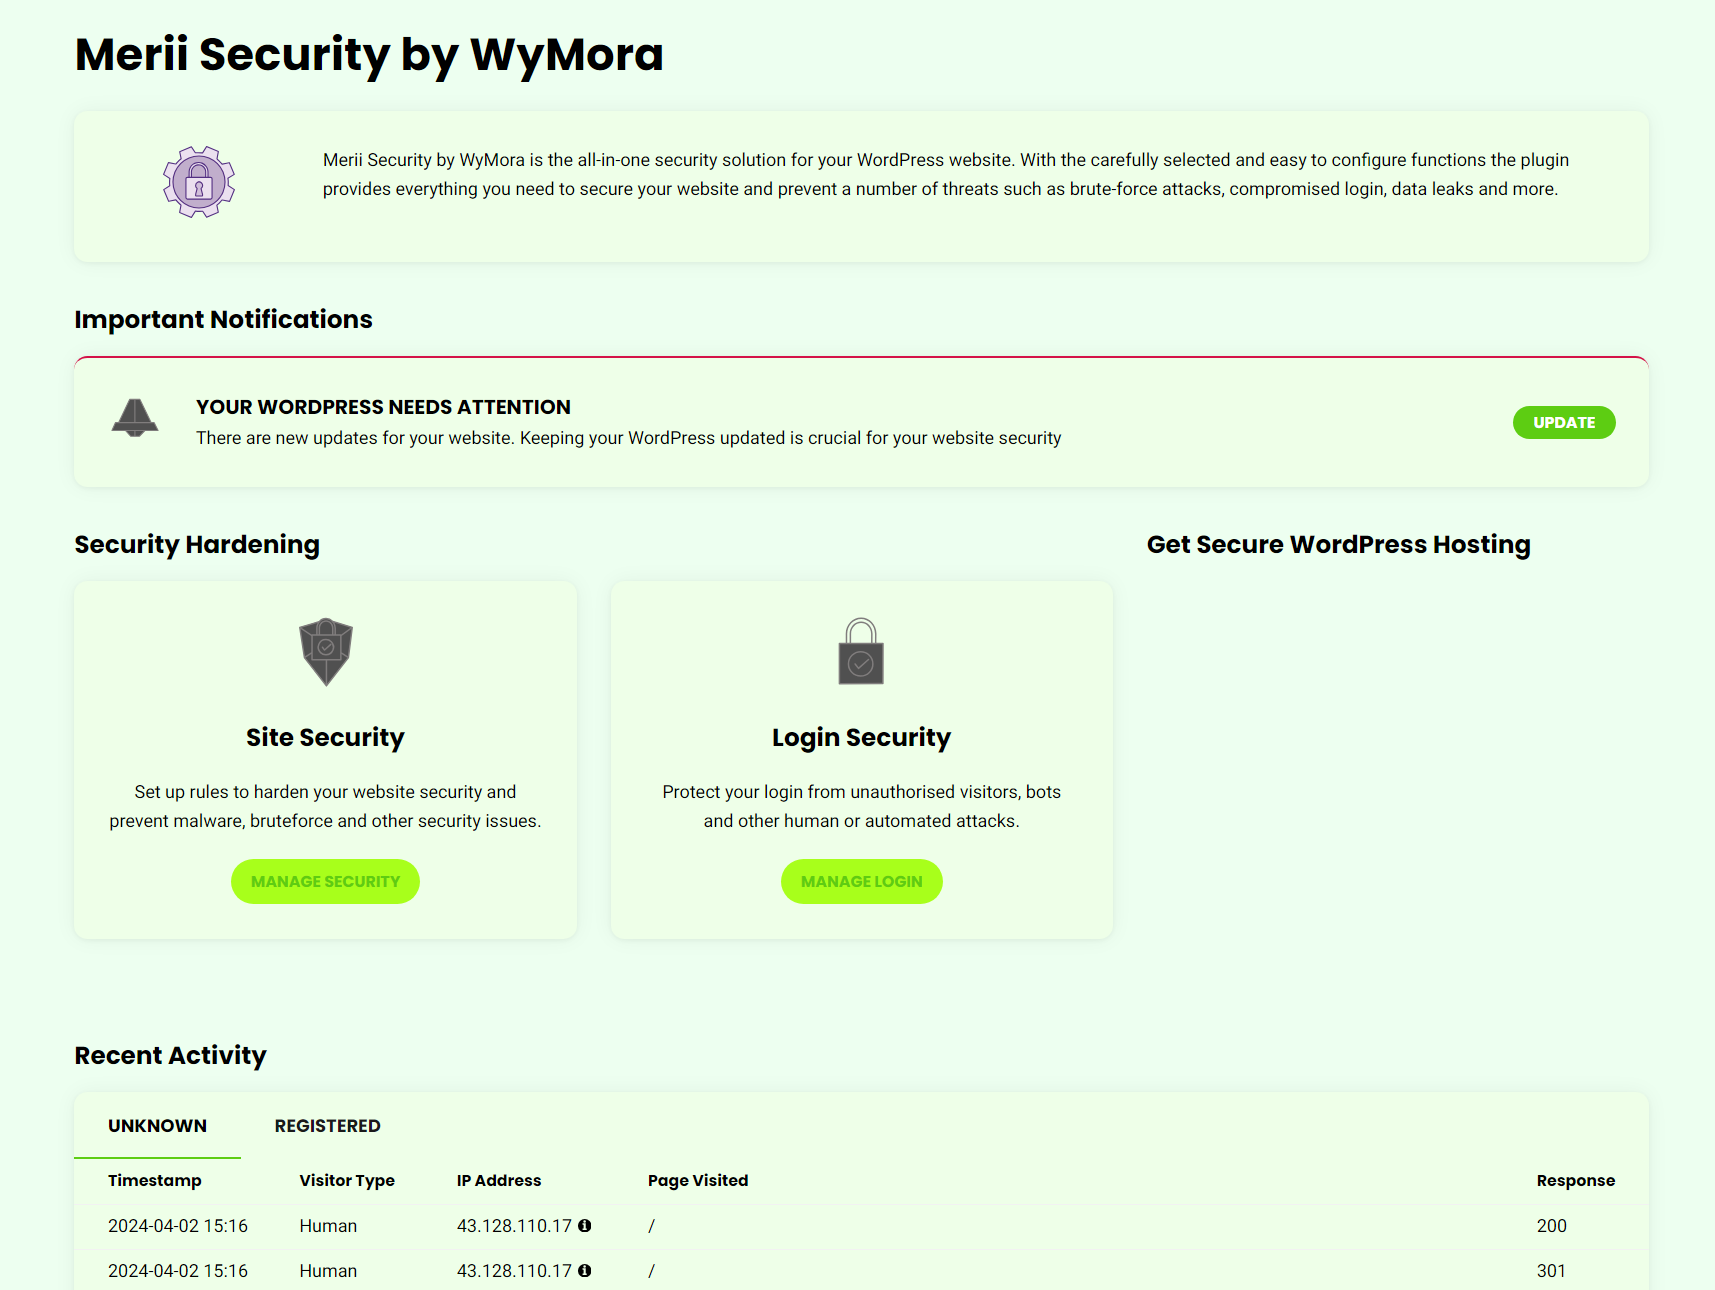
- Site Security
- Lock and Protect System Folders
- Enabling this option installs an .htaccess file in your WordPress system folders, effectively preventing the execution of unauthorized or suspicious scripts from these directories.

- Hide WordPress Version
- Enabling this option removes the information about your WordPress version from your site's HTML code. This prevents potential attackers who target specific WordPress versions from identifying your website for mass attacks.

- Disable Themes & Plugins Editor
- Enabling this feature removes the option to edit your website's theme and plugin code from the WordPress admin panel, thereby preventing unauthorized access via the WordPress editor.

- Disable XML-RPC
- XML-RPC was originally designed as a protocol for WordPress to communicate with third-party systems. However, it has been exploited in various security breaches. Unless it is specifically required for your website's functionality, it is strongly advised to keep XML-RPC disabled at all times.

- Disable RSS and ATOM Feeds
- Enabling this option will disable RSS and ATOM feeds, which are often exploited for content scraping and potential attacks on your website. If you do not have any readers using RSS feeds, it is advisable to enable this option for added security.

- Advanced XSS Protection
- Cross-Site Scripting (XSS) attacks involve injecting malicious scripts into trusted websites. This feature enhances your website's security by automatically adding additional protection headers to the site's HTTP responses, thereby safeguarding against XSS attacks.

- Delete the Default Readme.html
- Enabling this option will remove the default readme.html file that accompanies your WordPress core files. Attackers can potentially use this file to compile lists of vulnerable sites for hacking or other malicious activities.

- Database Security Hardening
- Secure your WordPress database by changing the default prefix, utilizing strong credentials, and optimizing it regularly.

- Secure File Upload Handling
- Implement stringent controls and validation protocols for file uploads to thwart the potential upload of malicious files onto your server. This includes verifying file types, imposing size limits, and conducting malware scans on uploads before permitting processing or storage.

- DDoS Protection
- Implement robust DDoS protection mechanisms to minimize the impact of distributed denial-of-service (DDoS) attacks, which seek to inundate your website with excessive traffic.

- Load Balancing and Redundancy
- Deploy load balancing and redundancy strategies to evenly distribute incoming traffic across multiple servers or data centers.

- Login Security
- Custom Login URL
- The default WordPress login URL is frequently targeted by attackers and SPAM bots. With the Security Optimizer plugin, you can customize the login URL to mitigate such attacks. Additionally, if you've enabled user registration on your website, you can also change the default sign-up URL for added security.

- Login Access
- Merii Security Optimizer allows you to restrict WordPress login access to specific IP addresses or ranges, enhancing security by thwarting brute-force attacks and malicious login attempts.

- Two-factor Authentication for Admin & Editors Users
- Enabling this feature introduces an additional layer of security for logging into your WordPress account. In addition to your regular username and password, you'll need to input a second password generated by an application on your smartphone. This two-factor authentication method significantly enhances security, ensuring that even if one factor is compromised, your data remains protected.

- Disable Common Usernames
- Enabling this option helps mitigate security threats associated with common usernames, such as 'admin', which are often exploited for unauthorized access. It disables the creation of such common usernames and prompts users with weak usernames to choose new ones. Additionally, toggling this feature triggers a pop-up window where users can easily select new usernames to automatically replace existing weak ones, enhancing overall security measures.

- Limit Login Attempts
- Implement login attempt limits for individual users accessing your wp-admin area. After reaching the specified limit of incorrect login attempts, the originating IP address will be temporarily blocked. Initially, the block lasts for 1 hour, and if unauthorized attempts persist, the block duration increases to 24 hours and subsequently to 7 days, effectively deterring brute-force attacks and unauthorized access attempts.

- Activity Log
- The Activity Log in the Security Optimizer plugin records all website activity over the past 12 days, including human visits, bot crawls, registered user actions, and login attempts. It helps identify suspicious activities and understand site audience. The log has three tabs: Unknown, Registered, and Blocked.
- Unknown Activity
- The Unknown tab in the Activity Log displays recent unregistered traffic, including timestamps, IP addresses, and response codes. A 200 response indicates a successful request. This log aids in detecting suspicious activity, such as repeated login attempts or unusual bot traffic. You can easily block or unblock IPs in the Actions tab to prevent unauthorized access. Blocked IPs are listed in the Blocked tab for easy management.

- Registered Activity
- The registered user activity log allows you to monitor user actions and identify any unusual behavior or unauthorized changes. If you suspect a user's account has been compromised or they are not adhering to proper conduct, you can block them in the Actions tab by selecting "Manage User Traffic." This action changes their role to "subscriber," limiting their access rights to browsing only. All blocked users are listed in the Blocked tab, where you can easily unblock them at any time, restoring their previous role.

- Blocked IPs and Users
- In the Blocked tab, you'll find a list of currently blocked IPs and users categorized into three types: Manually Blocked IP Addresses: IPs that you manually blocked from the Unknown Activity tab. These remain blocked until you manually unblock them. Automatically Blocked IP Addresses: IPs that attempted to log in with incorrect credentials multiple times. These blocks expire based on your "Login Attempt Limit" setting, ranging from 1 hour to 7 days. Blocked Users: Users you manually blocked from the Registered tab. They remain blocked until you manually unblock them.

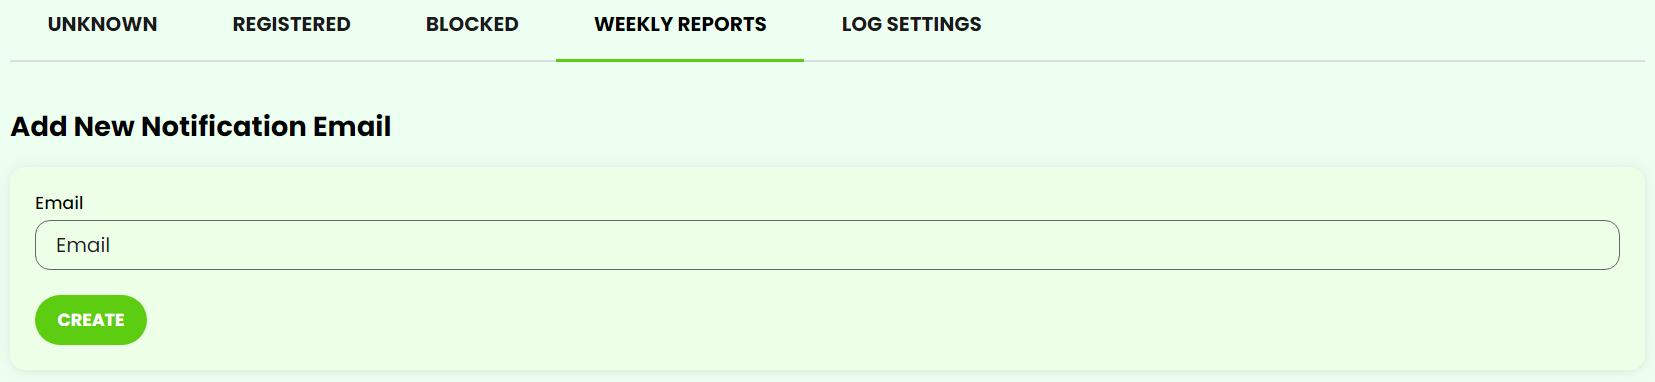
- Weekly Reports Configuration
- In the Weekly Reports tab, you can specify email addresses to receive weekly reports detailing website activity. By default, administrator users' email addresses are automatically included. To add more recipients, enter the desired email address in the Email field and click Create. Existing recipients are listed below, allowing you to edit or remove entries by clicking the corresponding icon.
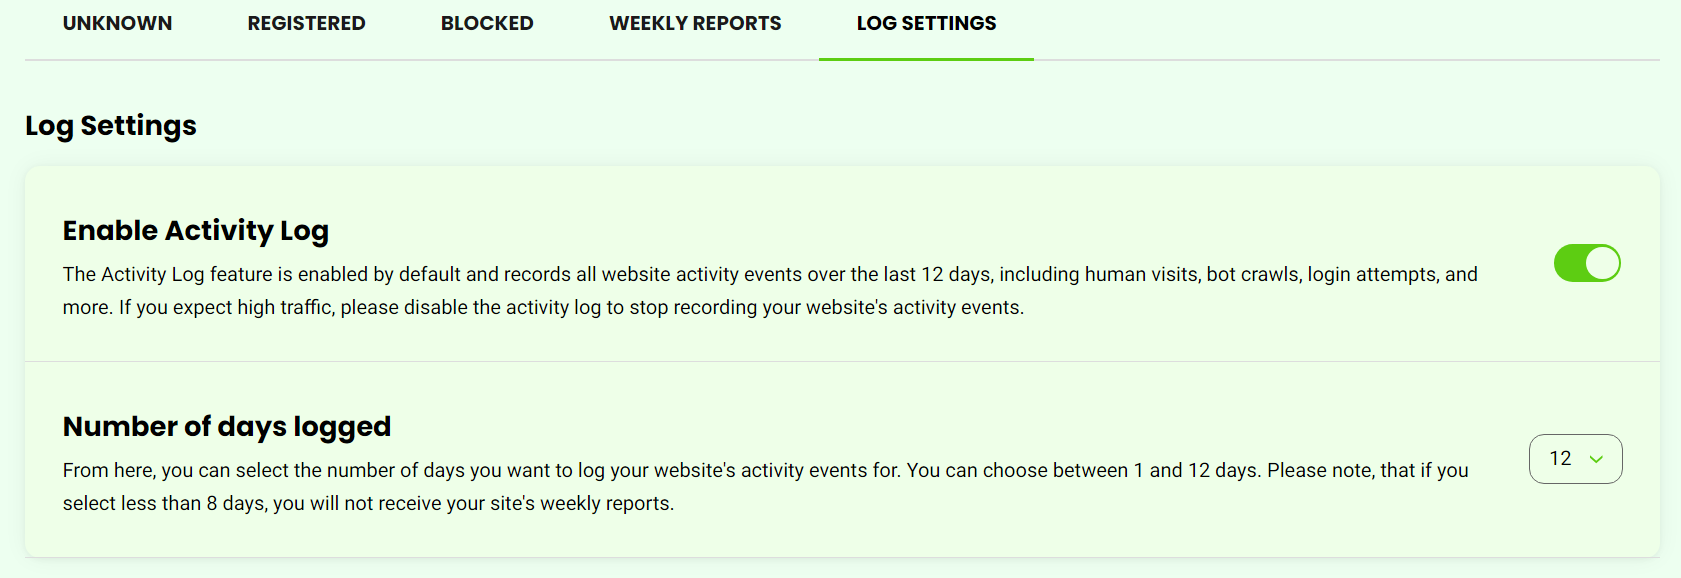
- Log Settings
In the Log Settings tab, you can adjust your activity log settings:
Enable activity log: The activity log is enabled by default. If you anticipate high traffic, you can disable it to cease recording your website’s activity events.
Manage your Activity Logs: This setting allows you to customize the number of days you want to log your website’s activity events, ranging from 1 to 12 days. Note that opting for fewer than 8 days will result in the cessation of weekly reports for your website.